Vim for Writing
Extended configuration and plugins for improved experience
I happen to be a Vim user—not because I practice terminal voodoo or intend to push the limits of keyboard efficiency—because Vim is what I started with and had no reasons to move on. If you do not find Vim to be a reasonable choice, that is perfectly fine. There exists a natural equilibrium in the community where users keep keep updating their preferences as the tools evolve.
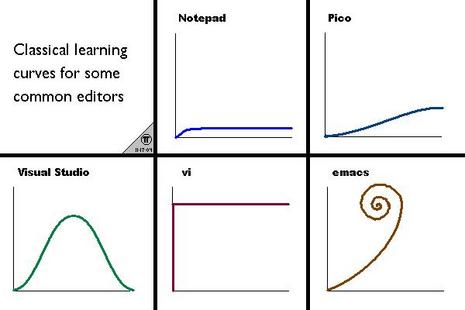
Over years, I have spent countless hours learning my editor environment and customizing it to my needs. It was not an easy task, and to to some extent, justified the funny learning curves of classical text editors. Nonetheless, With time Vim went beyond an excellent code editor and developed into my primary writing tool for composing emails, editing and proof-reading drafts, and writing thesis. Naturally, some configurations adopted for code-heavy environment demanded a revisit.
However, one of the good aspects of Vim is its extreme level of customizability. Vim can be extended much beyond its ‘out of the box’ abilities by writing plugins in Vimscript — a programming language written specifically for Vim. Since programmers like to configure and adapt their tools to their programming environment and experience, over thousands of plugins have been written and made available for Vim. For example, plugins to add advanced auto-completion plugins, fuzzy-file searches, improved code search and navigation, custom shortcuts, and quick compile or debug tools. However, let’s say this for record, you do not need to know Vimscript to use Vim and neither it is one of the most friendly languages to learn.
An important component of this experience is a set of plugins I added to my configuration, allowing me to observe typos, spelling mistakes, auto-correct minor errors, and even perform an advanced thesaurus lookup. If you are interested in such a setup for your Vim, this post might be useful.
Plugins
I used the following plugins — most of them are by reedes:
The pencil plugin aspires to make Vim as powerful a tool for writers as it is for coders by focusing narrowly on the handful of tweaks needed to smooth the path to writing prose.
Highlights weak patterns of writing, for example, weasel words, jargon, opinion, redundant words, similies.
Highlights repeated use of a phrase of word in your text. For example, over usage of very, much, like.
Lightweight auto-correct plugin that replaces commonly mistaken patterns of text with the correct one, for example, teh to the, heer to here, Im to I’m.
Builds on Vim’s spell-check and thesaurus/dictionary completion.
vim-textobj-user, vim-textobj-sentence, vim-textobj-quotes
Add additional text objects to Vim. For example, ‘,” (quotes) characters, sentence or paragraph level navigation and selection, quickly selecting and editing dates and times.
Wrapper around LanguageTool that runs the application in background and allows navigation and correction from inside the Vim.
Quickly look up any word on Thesaurus.com to get synonyms, antonyms and other details available.
Installation
The easiest way to set up and maintain these plugins is to use a Vim Plugin
manager. There are many — Pathogen, NeoBundle, Vundle, Vim-Plug, Dein — but
I find vim-plug easiest to configure and use. The snippets given on this page,
thus, can be directly used with your vim-plug configuration. However, if you are
using any other plugin manager, you can find equivalent installation
instructions on their respective web pages.
The for argument for each of the plugins specifies Vim to load these plugins
only where certain file types are edited — it’s called lazy-loading. Also, you
must have vim-plug installed and the code pasted between the call plug#begin() and call plug#end statements.
Just add these plugins to your .vimrc :
" Writing and Text-Objects plugins {{{
Plug 'kana/vim-textobj-user'
Plug 'vim-scripts/LanguageTool', {'for': ['text', 'markdown']}
Plug 'reedes/vim-textobj-quote', {'for': ['text', 'markdown']}
Plug 'reedes/vim-textobj-sentence', {'for': ['text', 'markdown']}
Plug 'reedes/vim-litecorrect', {'for': ['text', 'markdown']}
Plug 'reedes/vim-wordy', {'for': ['text', 'markdown']}
Plug 'reedes/vim-pencil', {'for': ['text', 'markdown']}
Plug 'reedes/vim-lexical', {'for': ['text', 'markdown']}
Plug 'dbmrq/vim-ditto', {'for': ['text', 'markdown']}
" }}}
Once done, save your .vimrc and exit. Open Vim again and run PlugInstall.
Vim-Plug will install the plugins one by one.
Configuration
The installation is almost complete — except the Language Tool plugin. It is simply a wrapper of the main
program which you can download from the website and extract in a convenient
location on your disk. We’ll need the path of jar files for proper plugin
configuration.
After the installation is complete, we need to add a few lines to initialize to
initialize the setup:
Note that the lines should be added outside the plug#begin and plug#end
calls — preferably towards the end.
" Custom {{{
function! Prose()
  call pencil#init()
  call lexical#init()
  call litecorrect#init()
  call textobj#quote#init()
  call textobj#sentence#init()

  " manual reformatting shortcuts
  nnoremap <buffer> <silent> Q gqap
  xnoremap <buffer> <silent> Q gq
  nnoremap <buffer> <silent> <leader>Q vapJgqap

  " force top correction on most recent misspelling
  nnoremap <buffer> <c-s> [s1z=<c-o>
  inoremap <buffer> <c-s> <c-g>u<Esc>[s1z=`]A<c-g>u

  " replace common punctuation
  iabbrev <buffer> -- –
  iabbrev <buffer> --- —
  iabbrev <buffer> << «
  iabbrev <buffer> >> »
endfunction

" automatically initialize buffer by file type
autocmd FileType markdown,mkd,text,rst call Prose()

" invoke manually by command for other file types
command! -nargs=0 Prose call Prose()

let g:languagetool_jar=''
}}}"
In the last line, insert the path of languagetool-commandline.jar file that
you extracted from Language Tool binaries downloaded in previous step.
That’s all. You are set. There are a few advanced usage options that you might be interested in setting up. The plugin documentations and help files are useful for that purpose. Alternatively, take a look at my configuration.
Preview
